Q.1. Can you explain the practical distinctions between findElement and findElements in the context of web automation, and share a specific scenario where you chose one over the other?
Explanation:
In Selenium WebDriver, findElement is used to locate the first web element on a page using various locators like id, name, classname, xpath, etc., returning a single WebElement. On the other hand, findElements returns a list of web elements based on the provided locator strategy. Both methods are affected by ImplicitlyWait to ensure the web elements are present before interaction.
Reference Link:
https://www.selenium.dev/documentation/webdriver/elements/finders/
Scenario:
In my project, we had to click a unique button on a webpage. For this specific and singular action, I opted for findElement because it returns a single WebElement, and we were confident that only one matching element existed. Conversely, when dealing with multiple elements, like extracting all links on a page, I used findElements to obtain a list of matching elements.
Example using findElement:
// Using findElement
WebElement singleElement = driver.findElement(By.id("buttonId"));
singleElement.click();
Example using findElements:
// Using findElements
List<WebElement> allLinks = driver.findElements(By.tagName("a"));
for (WebElement link : allLinks) {
    System.out.println(link.getAttribute("href"));
}
Exception:
I have faced the NoSuchElementException thrown by findElement when the element is not present in the DOM after reaching the max time applied by the ImplicitWait. To address this, I always double-check whether I’ve used the correct attributes present in the DOM and ensure that the WebElement is not inside frames or ShadowRoot/ShadowDOM, as these can impact the element’s visibility. findElements() does not throw an exception if no elements are found. Instead, it returns an empty list. To check whether the list of elements returned by findElements() is empty by checking its size before attempting to interact with.
Q.2. In a real-world project where you implemented the Page Object Model (POM), could you describe the type of framework you built and elaborate on how this approach improved the maintainability and efficiency of your test automation suite?
Explanation:
In my project, I established a Hybrid framework by incorporating the Page Object Model (POM) as a key design pattern. POM is a testing paradigm that prioritizes code maintainability, reusability, and readability by encapsulating web page interactions within dedicated classes known as Page Objects.
Why POM?
- Maintainability: POM advocates for a modular structure, where each page or application component is represented by a distinct Page Object. This design allows seamless updates and maintenance as alterations to the application are confined to specific Page Objects.
- Reusability: Through the encapsulation of page-specific actions and elements in Page Objects, the codebase becomes more reusable across different test cases. This reduction in redundancy enhances the overall efficiency of the automation code.
- Readability: Test scripts gain clarity and expressiveness as high-level actions on a page are abstracted into method calls within the corresponding Page Object.
Reference Link:
https://www.selenium.dev/documentation/test_practices/encouraged/page_object_models/
Use Case:
We worked with an e-commerce website with a multi-step checkout process involving distinct pages such as Cart, Shipping, and Payment. Leveraging the POM, we crafted a Page Object for each of these pages, encapsulating specific elements and actions. This modular approach facilitated streamlined test case creation and maintenance.
POM: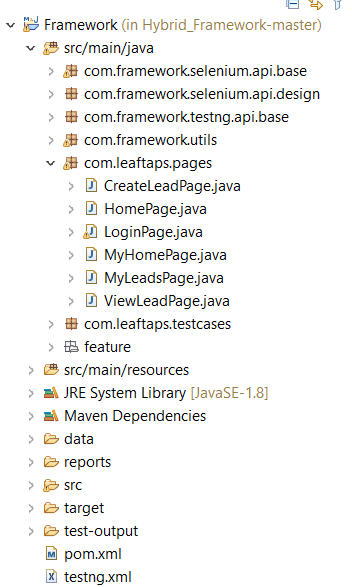
Exception Handling:
While implementing, NullPointerException may arise if the driver instance is not correctly initialized in the Page Object constructor. To mitigate this, I ensured proper initialization in my base class to prevent such exceptions.
Challenges and Solutions:
Before implementing the Page Object Model (POM), whenever there was a change in the user interface of our application, it used to be a challenging task. Without POM, we had numerous classes, and locating the specific class to make the necessary changes was a tedious process. This made the workflow less productive.
However, with the implementation of the POM design pattern, the scenario improved significantly. Now, since we have dedicated Page Objects for each page navigation, making changes has become much simpler. Instead of searching through multiple classes, I could swiftly locate and modify the required information in a single Page Object. This not only streamlined the process but also enhanced overall productivity.
The adoption of the Page Object Model significantly bolstered the maintainability and efficiency of our test automation suite. The structured separation of concerns within the Page Objects facilitated easy updates and reduced redundancy, resulting in a more robust and scalable framework.
Q.3. Can you share your experience dealing with dynamic elements in Selenium? Specifically, how have you successfully managed and interacted with elements on a webpage that change dynamically, and what strategies or techniques did you employ to ensure reliable test automation in such scenarios?
Answer:
Dealing with dynamic elements in Selenium is a common task in my projects. This happens when elements on a webpage change, often because of dynamic content loading.
Use Case:
For example, in a project where I worked on an application like Salesforce, we had a dropdown. The options in this dropdown changed dynamically based on user interactions or other asynchronous events.
Handling Exceptions: When dealing with dynamic elements, a common challenge is the StaleElementReferenceException. This happens if the webpage changes after locating the dropdown element. To handle this, we used WebDriverWait to wait for the element to become clickable or present or stalenessOfEle() before interacting with it.
Challenges and Solutions:
- Challenge: Figuring out the right conditions to wait for the dynamic element to be ready for interaction.
-
Solution: Using WebDriverWait with appropriate ExpectedConditions like
elementToBeClickableorpresenceOfElementLocatedto ensure the element is in the expected state before performing actions.
Q.4. Describe various wait mechanisms in Selenium, and explain the practical distinctions between implicit and explicit waits.
Explanation:
In the context of Selenium WebDriver, there are two primary types of waits: Implicit waits and explicit waits. Implicit waits are designed as a capability in Selenium and are specifically tailored to the methods findElement() and findElements(). When searching for an element in the Document Object Model (DOM), if the element is not immediately found, the implicit wait allows Selenium to continue searching for the element for a maximum time period.
If the element is not found even after this maximum time period, findElement() will throw a NoSuchElementException, while findElements() returns an empty list. Implicit waits are generally set once and applied globally. Implicit waits do not affect anything outside of element-related operations and do not influence the behavior of alerts, frames, windows, or the behavior of the WebElement itself. In cases where I need to handle these other aspects, I use explicit waits.
Code Snippet:
public class WaitMechanismsExample {
    public static void main(String[] args) {
        WebDriver driver = new ChromeDriver();
        driver.get("http://leaftaps.com/opentaps/control/mainrl");

        // Implicit Wait (applies to all elements)
        driver.manage().timeouts().implicitlyWait(Duration.ofSeconds(30));

        // Explicit Wait for a specific element
        WebDriverWait wait = new WebDriverWait(driver,Duration.ofSeconds(10));
        WebElement element = wait.until(ExpectedConditions.presenceOfElementLocated(By.id("username")));

        // Perform actions on the element
        element.click();
    }
}
Explicit waits are implemented through two different classes that adhere to the Wait interface.The FluentWait, is an older implementation, while the subclass of Fluent Wait, known as WebDriverWait, is the more commonly used form of explicit wait. WebDriverWait extends FluentWait, and FluentWait implements the Wait interface. Explicit waits are designed to wait for specific conditions, such as the appearance or disappearance of alerts, the readiness of frames, or the count of windows. They are especially useful for conditions like element clickability, dropdown selectability, or checking for the invisibility of elements.
Explicit waits are written very specifically, with conditions defined at each checkpoint in the code. Unlike implicit waits, where you set the timeout globally, with explicit waits, you specify the conditions wherever and whenever you need them. WebDriverWait includes a boolean condition, known as the “until” condition, which you set using the ExpectedConditions class. This class provides numerous expected conditions to choose from, such as checking for element visibility, presence, the presence of specific text, or the count of windows. Additionally, common conditions like stalenessOf(ele) are often used.
Exception:
WebDriverWait can throw a TimeoutException if the defined timeout period is exceeded. The FluentWait internally utilizes something called a “polling period,” which is set to 500ms by default. I can adjust this polling period to suit my needs. Essentially, FluentWait continuously checks the specified conditions at regular intervals (in this case, every 500ms) until the maximum timeout is reached. If the condition is not met by the time the maximum timeout is reached, it triggers a TimeoutException.
Q.5. Can you elaborate on the practical distinctions between the close() and quit() methods in Selenium WebDriver? How do you decide which one to use in different scenarios based on your hands-on experience?
Explanation:
-
close():- Definition: The
close()method closes the current browser window while keeping the WebDriver instance running. - Effect: In my project I use this method when I have multiple tabs/windows open, closing only the current one without terminating the WebDriver session.
- Use Case: It is ideal for scenarios with multiple open tabs/windows, where I want to close the active one.
- Definition: The
-
quit():- Definition: The
quit()method closes all browser windows, terminates the WebDriver session, and releases resources. - Effect: It is Suitable when I want to end the testing process, ensuring all browser windows are closed and resources are freed.
- Use Case: It is appropriate for scenarios like where I’ve completed my test suite or want to ensure a clean shutdown.
- Definition: The
Use Case:
-
Use
close()when:- Managing multiple browser tabs/windows during the test.
- I want to close only the current tab/window, continuing the test in others.
-
Use
quit()when:- Completing my entire test suite or scenario.
- Ensuring all browser windows are closed and WebDriver resources are released.
Decision Criteria:
-
Use
close()if:- Dealing with a multi-tab scenario and closing only the current tab/window is needed.
- Continuing testing in other open tabs/windows.
-
Use
quit()if:- Completing the entire testing process.
- Wanting to ensure a clean and complete closure of all browser windows.
Practical Distinctions:
-
close()Distinctions:- Leaves the WebDriver instance running.
- Suitable for managing multiple open tabs/windows.
- Doesn’t completely terminate the WebDriver session.
-
quit()Distinctions:- Terminates the WebDriver session and releases resources.
- Closes all browser windows.
- Ensures a complete closure of the WebDriver instance.
Decision-Making Based on Experience:
-
Decide to use
close()when:- Managing multiple browser tabs/windows during the test.
- I want to close only the current browser tab/window.
-
Decide to use
quit()when:- Completing my entire test suite or scenario.
- Ensuring a clean and complete closure of all browser windows and releasing resources.
So In my project, quit() is commonly used at the end of a test script to ensure a clean shutdown, while close() is used within a test script when managing multiple browser tabs/windows during the test execution. This approach ensures efficient resource management and a smooth testing process.
Q.6. How do you handle dropdowns in Selenium when they are implemented using both the tag and without using the tag? Can you share your approach or code snippets that demonstrate your experience in dealing with these different dropdown implementations?
Answer:
In Selenium WebDriver, dealing with dropdowns becomes a bit trickier when they deviate from the standard <select> tag. The typical Select class in Selenium is tailored for <select> tags, and when faced with a non-standard implementation, it tends to throw exceptions. My approach to overcoming this challenge involves a step-by-step strategy.
Code Snippet:
public class DropdownWithSelectTag {
    public static void main(String[] args) {
        WebDriver driver = new ChromeDriver();
        driver.get("http://leaftaps.com/opentaps/control/main");

          WebElement source = driver.findElement(By.id("createLeadForm_dataSourceId"));
		   //Create a Select class and pass the WebElement
		   Select dd = new Select(source);
		   //use the object and call the methods
		   dd.selectByIndex(2);
    }
}
Identify the Parent Element:
-
- Locate the parent element of the dropdown. This is the container that holds the dropdown values.
Click on the Parent Element:
-
- Use the appropriate Selenium code to click on the identified parent element. This action is crucial for triggering the dropdown to display its options.
Handle Dropdown Values Represented as <li> or <span>:
-
- After clicking on the parent element, observe how the dropdown values are represented. They might be in
<li>or<span>elements.
- After clicking on the parent element, observe how the dropdown values are represented. They might be in
Code Snippet:
public class DropdownWithoutSelectTag {
    public static void main(String[] args) {
        WebDriver driver = new ChromeDriver();
        driver.get("https://login.salesforce.com/?locale=in");

        // Locate the dropdown element and click to reveal options
       driver.findElement(By.xpath("//span[text()='Create']")).click();
	   driver.findElement(By.xpath("//span[text()='Custom Tab']")).click();

    }
}
-
- Construct XPath expressions using the ‘following’ axis. Starting from the clicked parent element, dynamically locate and interact with the dropdown elements based on their parent tag.
Custom Solution – Extended Select:
-
- In some projects, like the one I’ve worked on, a custom solution named “Extended Select” has been implemented. When the element is not a standard
<select>tag, we locate the parent element by its locator and then perform a click. The ‘following’ options in XPath help identify different tag names based on their text content.
- In some projects, like the one I’ve worked on, a custom solution named “Extended Select” has been implemented. When the element is not a standard
This approach provides a flexible and custom solution for handling non-standard dropdowns. It allows for dynamic interaction with dropdown elements, ensuring that the automation script adapts to different implementations encountered during testing.
Q.7. Can you tell me the distinctions between using getText() and getAttribute(), and explain about the usecase of it?
Explanation:
-
-
getText():- Definition: The
getText()method in Selenium is used to retrieve the visible text content of a web element. - Usage: It is specifically designed to extract the text that is visibly displayed on the webpage.
- Definition: The
-
getAttribute():- Definition: The
getAttribute()method is used to retrieve the value of a specified attribute of a web element. - Usage: It is more versatile, as it allows fetching not only text but also other attributes like href, class, id, etc.
- Definition: The
-
Use Case:
-
-
Use
getText()when:-
If I need to extract the visible text content of an element, such as getting the text within a
<span>or<div>tag. -
Example: Verifying the text displayed on a button or capturing the text of an error message.
    String text = driver.findElement(By.tagName("h2")).getText();
     System.out.println(text);
-
-
Use
getAttribute()when:- You want to fetch attribute values like href, class, id, etc.
- Example: Extracting the value of the “href” attribute from a hyperlink or retrieving the “class” attribute from an element.
-
Code Snippet:
// Example using getText()
WebElement element = driver.findElement(By.id("exampleId"));
String visibleText = element.getText();
System.out.println("Visible Text: " + visibleText);

// Example using getAttribute()
String hrefValue = element.getAttribute("href");
System.out.println("Href Value: " + hrefValue);
Challenges and Solutions:
Dynamic Content:
- In cases of dynamic content, text might change based on user interactions. Handling such scenarios involves dynamic waits and robust synchronization strategies.
- These challenges are tackled by closely examining the HTML structure, adapting code to handle dynamic content gracefully, and employing explicit waits to ensure that the elements are ready for interaction before fetching text or attributes.
Q.8. Can you share a specific instance where you had to effectively manage alerts using Selenium? How did you handle it, and what challenges did you encounter?
I was working on a web application that involved submitting a form, and depending on the data entered, an alert could be triggered. The alert contained a message confirming the successful submission or notifying about validation errors.
How I Handled It:
Code Snippet:
import org.openqa.selenium.Alert;
import org.openqa.selenium.By;
import org.openqa.selenium.WebDriver;
import org.openqa.selenium.WebElement;
import org.openqa.selenium.chrome.ChromeDriver;

public class AlertHandlingExample {
    public static void main(String[] args) {
        WebDriver driver = new ChromeDriver();
        driver.get("https://www.leafground.com/alert.xhtml");

        // Locate the element that triggers the alert (e.g., a Submit button)
        WebElement button = driver.findElement(By.xpath("//span[text()='Show']"));
        button.click();

        // Use WebDriverWait to wait for the alert to be present
        WebDriverWait wait = new WebDriverWait(driver, Duration.ofSeconds(20));
        wait.until(ExpectedConditions.alertIsPresent());

        // Switch to the alert
        Alert alert = driver.switchTo().alert();

        // Retrieve the alert message
        String alertMessage = alert.getText();

        // Perform actions based on the alert message or accept/dismiss the alert
        if (alertMessage.contains("success")) {
            // Handle success scenario
            System.out.println("Success: " + alertMessage);
            alert.accept();
        } else if (alertMessage.contains("error")) {
            // Handle error scenario
            System.out.println("Error: " + alertMessage);
            alert.dismiss();
        }

        // Continue with the rest of the test
    }
}
Exceptions:
- NoAlertPresentException: This exception might occur if an attempt is made to switch to an alert when no alert is present.
- UnhandledAlertException: This exception might occur if there is an unhandled alert on the page.
Challenges Encountered:
-
Timing Issues:
- Challenge: Alerts might not be immediately present after triggering an action. Waiting for the alert to be present is crucial.
- Solution: I used WebDriverWait to wait for the alert to be present before attempting to switch to it.
-
Handling Different Scenarios:
- Challenge: The alert message could indicate success or failure, and the script needed to handle both scenarios appropriately.
- Solution: I retrieved the alert message using
alert.getText()and then implemented conditional logic to perform actions based on the content of the message.
Handling alerts effectively is crucial for scenarios where user interactions trigger pop-up alerts. It requires synchronization to ensure that the alert is present before attempting to interact with it, and the content of the alert message needs to be considered for proper test flow control.
Q.9. Explain Selenium WebDriver Architecture.
Explanation:
Selenium is an open-source library that can be utilized in multiple programming languages, with each language having its own corresponding bindings.
For example, when using the Java language binding, the following Java code:
ChromeDriver driver = new ChromeDriver();
This Java code internally calls the Selenium Java implementation, which, in turn, calls W3C protocol-based requests or JSON wire protocol.
Selenium 4 completely uses the W3C protocol, whereas Selenium 3 and older versions use JSON protocols.
Technically, it’s more of a REST API calls, with these calls reaching the ChromeDriver, which are native drivers running on the local machines.
These API requests hit the local server, where the requests are received, processed, and executed within the attached browser.
The browser can be either the ChromeDriver or Firefox Driver. After execution, the response is captured and sent back from the ChromeDriver to the language binding as a response.
The Selenium Java bindings then capture this response, and based on the response information, either as an exception or an outcome, it provides the corresponding result. This is the fundamental architecture of Selenium’s navigation.
This architecture is true for other browsers like IE, Safari, Opera, or when writing code in Python or C#.
Q.10. Can you describe how you use the Actions class in Selenium to achieve drag-and-drop functionality in a web application and provide examples where you have successfully implemented this technique to enhance test automation?
Explanation: The Actions class in Selenium is used for performing complex user interactions like mouse and keyboard actions. For drag-and-drop functionality, we utilize the dragAndDrop method of the Actions class. This allows us to click and hold an element, drag it to another location, and then release the mouse.
Use Case: In my project while working with Salesforce application I have a web page with a drag-and-drop feature for arranging items in a list. I want to automate the testing of this functionality to ensure that the items are rearranged correctly after a drag-and-drop operation.
Code Snippet:
import org.openqa.selenium.By;
import org.openqa.selenium.WebDriver;
import org.openqa.selenium.WebElement;
import org.openqa.selenium.chrome.ChromeDriver;
import org.openqa.selenium.interactions.Actions;

public class DragAndDropExample {
    public static void main(String[] args) {
     ChromeDriver driver = new ChromeDriver();
 	driver.get("https://www.leafground.com/drag.xhtml;");
 	driver.manage().window().maximize();
 	driver.manage().timeouts().implicitlyWait(Duration.ofSeconds(10));
 	WebElement drag = driver.findElement(By.id("form:conpnl_header"));
 	WebElement drop = driver.findElement(By.xpath("//div[@id='form:drag']//div"));
 	Actions builder = new Actions(driver);
 	builder.dragAndDrop(drag, drop).perform();
    }
}
Exception Handling: One potential exception I have faced in using Actions class is the `MoveTargetOutOfBoundsException`. This occurs if the target element is not visible or not in the viewport, making it impossible for Selenium to perform the drag-and-drop action. I always ensure the visibility of the target element which mitigates this issue.
Challenges and Solutions:
-
-
Identifying Elements Correctly Identifying the source and target elements accurately is crucial. I addressed this challenge by using unique and stable locators, such as IDs or CSS classes, to ensure that the correct elements are selected.
-
Asynchronous Operations In some cases, drag-and-drop actions may trigger asynchronous operations on the web page. I handled this by incorporating waits (e.g.,
WebDriverWait) to ensure that the elements are present and visible before attempting the drag-and-drop operation.
-
Q.11. How would you use getWindowHandle() and getWindowHandles() in a practical scenario, and what distinguishes the two methods in real-world applications?
Explanation:
getWindowHandle() and getWindowHandles() are two different methods in Selenium WebDriver used for handling multiple browser windows or tabs during test automation.
UseCase:
In my project, I faced a scenario where I have a web application that opens a new browser window or tab after clicking a link. I want to interact with elements in both the original window and the newly opened one. In this case, I Used getWindowHandle() to get the handle of the current window before clicking the link and Use getWindowHandles() after clicking the link to get all window handle and finally iterate through the handles to switch to the new window and perform actions.
Code Snippet:
    ChromeDriver driver = new ChromeDriver();
	driver.get("https://www.leafground.com/window.xhtml");
	driver.manage().window().maximize();
	driver.manage().timeouts().implicitlyWait(Duration.ofSeconds(10));
	//click open button
	driver.findElement(By.xpath("//span[text()='Open']")).click();
	//get the title of the parent window
	String pTitle = driver.getTitle();
	System.out.println("Parent Title is : "+pTitle);
	//get the window handle
	String pWindowHandle = driver.getWindowHandle();
	System.out.println(pWindowHandle);
	//to get all window handles
	Set<String> windowHandles = driver.getWindowHandles();
	//to switch to a particular index
	List<String> handles = new ArrayList<>(windowHandles);
	//switch to the particular window using index
	driver.switchTo().window(handles.get(1));
	//to print all the window handles
	for (String each : windowHandles) {
		System.out.println(each);
	}
	//child window title
	String cTitle = driver.getTitle();
	System.out.println(cTitle);
	driver.quit();
Exception:
One common exception associated with this code is NoSuchWindowException. This can occur if the window handle obtained using getWindowHandle() is no longer valid when trying to switch back.
Challenges and Solutions:
-
Challenge 1: Handling dynamic window handles, especially when windows are opened based on user interactions.
Solution: Implementing a wait mechanism to ensure all windows are available before getting handles.
-
Challenge 2: Dealing with intermittent issues where the new window takes time to load.
Solution: Incorporating explicit waits for elements in the new window to ensure it’s fully loaded before interacting with it.
Q.12.Describe the steps you would take to handle file uploads using Selenium. Can you share a specific example where you successfully implemented file upload functionality?
Explanation:
Handling file uploads using Selenium involves interacting with file input elements on a web page, providing the path to the file to be uploaded, and triggering the upload process.
UseCase:
In my project, I have a web application that allows to upload a profile picture. I want to automate the process of selecting a file from my local machine and uploading it through the web application.In this case,I identified the file input element on the web page and used sendKeys() method to send the local file path to the input element and Submit the form or trigger the upload process.
Code Snippet:
// Identify the file input element
WebElement fileInput = driver.findElement(By.id("fileInputId"));

// Provide the path to the local file
String filePath = "/path/to/your/file.jpg";
fileInput.sendKeys(filePath);
Exception:
One common exception associated with file uploads is ElementNotInteractableException. This can occur if the file input element is not visible or not enabled.
Challenges and Solutions:
-
Challenge: Dealing with different file input mechanisms (e.g., input type=”file” or custom upload controls).
-
Solution: Identifying the appropriate mechanism used by the application and adapting the automation script accordingly. In some cases, JavaScript may need to be executed to trigger the file input.
-
Example from Past Experience: In a previous project, we had a feature that allowed users to upload documents. I used Selenium to automate this process. The challenge was that the file input element was initially hidden and only became visible after clicking a button. I addressed this by first clicking the button to reveal the file input, then sending the file path using sendKeys(), and finally submitting the form. Explicit waits were crucial to ensure the elements were ready for interaction.
Q.13. How have you utilized WebDriverWait, and in what scenarios did you find it particularly valuable?
Explanation:
WebDriverWait is a part of the Selenium WebDriver framework that provides a mechanism to wait for a certain condition to be met before proceeding with the execution. It is particularly useful for handling particular behaviour of a WebElement in test automation.
UseCase:
In our project, we need to verify the confirmation message to appear after submitting the form. While automating this scenario, the testcase fails consistently. To resolve the issue, we WebDriverWait to handle the scenario. We create a WebDriverWait instance with a timeout of 10 seconds and use the until method to wait until the confirmation message becomes visible on the page. Once the confirmation message is visible, we retrieve the text of the message using confirmationMessage.getText() and store it in a variable for further verification.
Code Snippet:
WebDriverWait wait=new WebDriverWait(driver,Duration.ofSeconds(10));
wait.until(ExpectedConditions.visibilityOfElementLocated(By.xpath(message)));
Exception:
It’s important to note that WebDriverWait can throw a TimeoutException if the defined timeout period is exceeded. The FluentWait internally utilizes something called a “polling period,” which is set to 500ms by default. You can adjust this polling period to suit your needs. Essentially, FluentWait continuously checks the specified conditions at regular intervals (in this case, every 500ms) until the maximum timeout is reached. If the condition is not met by the time the maximum timeout is reached, it triggers a TimeoutException.
Challenges and Solutions:
In a web application with dynamic content loading, I encountered issues where the script was trying to interact with elements before they were fully loaded. By implementing WebDriverWait with conditions like visibilityOfElementLocated, I improved the script’s reliability. This was crucial for a seamless automation flow, especially when dealing with dynamic updates on the page.
Q.14. How have you utilized JUnit and TestNG in your testing practices, and what specific differences or advantages have you observed between the two in your projects?
Explanation:
JUnit and TestNG are both testing frameworks used in Java for writing and running test cases. They provide annotations and assertions to structure and validate test code.
UseCase:
In my project, we were tasked with creating and executing test cases for a web application.
Use JUnit or TestNG to annotate test methods. Organize test suites and test dependencies using the respective framework’s features. Leverage assertions to validate expected outcomes.
Code Snippet:
import org.testng.Assert;

public class MyTest {

    @Test
    public void testExample() {
        // Test logic
        String actualResult = "Hello, World!";
        String expectedResult = "Hello, World!";

        // Assertion
        Assert.assertEquals(actualResult, expectedResult, "Test failed: Actual result does not match expected result");
    }
}
Differences/Advantages:
- TestNG Advantages:
Flexible Annotations: TestNG provides a broader set of annotations (e.g., @BeforeSuite, @AfterSuite, @Parameters) allowing more fine-grained control over test execution.
Dependency Management: TestNG supports test dependencies, ensuring that certain tests run only if the dependent tests pass.
Parallel Execution: TestNG allows parallel execution of test methods, which can significantly reduce test execution time.
- JUnit Advantages:
Simplicity: JUnit is simpler and has a shallower learning curve, making it a good choice for smaller projects or teams new to testing frameworks.
Ecosystem: JUnit has a large ecosystem and is widely adopted, making it a common choice for various Java projects.
Challenges and Solutions:
-
Challenge 1: Adapting to different annotation styles and features.
Solution: Understanding the specific needs of the project and selecting the framework that aligns better with those needs. -
Challenge 2: Handling test dependencies efficiently.
Solution: Leveraging TestNG’s built-in support for dependencies to manage the order of test execution. -
Example from Past Experience: In a project where parallel test execution was critical due to time constraints, I opted for TestNG because of its built-in support for parallelism. This significantly reduced the overall test execution time, allowing us to run a large suite of tests in a much shorter period. Additionally, TestNG’s annotation flexibility and dependency management proved beneficial in orchestrating complex test suites with varying requirements.
Q.15. Can you share your approach for capturing screenshots using Selenium? Walk me through the steps you would take to capture and save screenshots during automated testing.
Explanation:
Capturing screenshots using Selenium involves utilizing the TakesScreenshot interface to capture the current state of the WebDriver instance and then saving it as an image file. This is a valuable practice in automated testing for visual verification and debugging.
UseCase:
In a scenario where we are running a suite of automated tests for a web application, we want to capture screenshots at critical points, such as after a successful login or when a specific element fails to load. At this point, we call the captureScreenshot method at key points in my test scripts to capture screenshots and provide the WebDriver instance and a file path where the screenshot should be saved.
Code Snippet:
import org.openqa.selenium.WebDriver;
import org.openqa.selenium.OutputType;:
import org.apache.commons.io.FileUtils;
import java.io.File;

public class ScreenshotUtils {

    public static void captureScreenshot(WebDriver driver, String screenshotPath) {
        try {

            File sourceFile = driver.getScreenshotAs(OutputType.FILE);
			File destn=new File("./snap/shot.jpg")
            FileUtils.copyFile(sourceFile, destn);
        } catch (Exception e) {
            e.printStackTrace();
            // Handle exceptions if needed
        }
    }
}
Exception: One common exception I have faced with this code is IOException from FileUtils.copyFile() method. This can occur if there is an issue with the file operation, such as insufficient permissions or a non-existent destination path.
Challenges and Solutions:
- Challenge: Managing and organizing a large number of screenshots.
- Solution: Dynamically generate file paths based on timestamps or test case names to avoid overwriting and facilitate organization.
Q.16. Can you share your experience in dealing with iframes and nested iframes while using Selenium for web automation? Specifically, how have you successfully navigated and interacted with iframes?
Explanation:
iFrames (Inline Frames) are HTML elements that allow embedding one HTML document inside another. When dealing with iframes in Selenium, we need to switch the focus of the WebDriver to the iframe to interact with elements inside it.
UseCase:
In my project, we have a web page that contains an iframe, and within that iframe, there is another nested iframe. You need to interact with elements inside both iframes. In this case, First we identify the iframes using methods like driver.switchTo().frame() by using the overloading methods like index, id, WebElement to switch focus and Perform actions on elements within the iframes and Switch back to the main window using defaultContent() when done.
Challenge: Dynamic Iframe Loading
- Example: Iframes that load dynamically after some user action. Strategy: Use explicit waits (WebDriverWait) to ensure the iframe is present before switching to it. For example:
   WebDriverWait wait = new WebDriverWait(driver, Duration.ofSeconds(20));
   wait.until(ExpectedConditions.frameToBeAvailableAndSwitchToIt("dynamicFrame"));
Code Snippet:
        ChromeDriver driver = new ChromeDriver();
		driver.get("https://www.leafground.com/frame.xhtml");
		driver.manage().window().maximize();
		driver.manage().timeouts().implicitlyWait(Duration.ofSeconds(10));
		//switch to the parent frame
		WebElement frameEle = driver.findElement(By.xpath("//h5[text()=' Click Me (Inside Nested frame)']/following::iframe"));
		driver.switchTo().frame(frameEle);
		//switch to the nested frame
		driver.switchTo().frame(0);
		//click he button inside this frame
		driver.findElement(By.id("Click")).click();
        driver.switchTo().defaultContent();
Q.17. Can you share examples of how you’ve effectively utilized TestNG annotations in your testing projects? Highlight specific scenarios where the use of annotations contributed to the success of your test automation efforts.
Explanation:
TestNG annotations play a crucial role in structuring and controlling the flow of test execution in Selenium automation projects. Annotations such as @Test, @BeforeMethod, @AfterMethod, @BeforeClass, and @AfterClass allow for better organization and control over test cases.
Use Case:
In my project, we use a framework called TestNG to run our tests. Before we start running tests, we need to set up some things. We use annotations to tell the framework what to do at different steps. BeforeSuite: It gets things ready before anything else. we start our report here. BeforeTest: Once we start, we need to decide what tests we want to run. Here, we set up details like which Excel sheet to use BeforeClass: Here we focus on specific groups of tests, kind of like organizing them. We set up details for each group of tests. DataProvider: This provides data for our tests. BeforeMethod: Before each test, we need to launch the browser and apply waits. This annotation helps set up things before each test. @Test:This is where the actual testing happens and we use this annotation to mark them. AfterMethod: After each test, we need to clean up. This annotation helps with those post-test activities. AfterSuite: Once all tests are done, We close our report.
So, these annotations are like instructions for our testing framework, helping it to organize, prepare, and clean up as it runs our tests. They make the whole testing process smoother and more organized.
Code Snippet:
import org.openqa.selenium.WebDriver;
import org.openqa.selenium.chrome.ChromeDriver;
import org.testng.annotations.*;

public class ECommerceTestSuite {
    WebDriver driver;

    @BeforeClass
    public void setUp() {
        // Code for initializing the WebDriver, opening the browser, etc.
        driver = new ChromeDriver();
    }

    @Test(priority = 1)
    public void testUserAuthentication() {
        // Test code for user authentication
    }

    @Test(priority = 2)
    public void testProductSearch() {
        // Test code for product search functionality
    }

    @AfterClass
    public void tearDown() {
        // Code for closing the browser and performing cleanup
        driver.quit();
    }
}
Challenges and Solutions:
-
-
Challenge: Parallel Execution Achieving parallel execution of tests. TestNG provides the capability to run tests in parallel, enhancing the overall speed of test execution. Annotations like
@Parametersand@DataProvidercan be used to facilitate data-driven testing in parallel.Solution: By effectively using TestNG annotations, I was able to create a well-structured test suite with proper setup, execution order, and teardown, resulting in more maintainable and scalable test automation projects.
-
Q.18. Explain the most occurring exception in your project. How will you handle StaleElementReferenceException?
Explanation:
A “StaleElement” reference occurs when we find an element using driver.findElement(), and initially, the element is present, returning a WebElement to the Selenium WebDriver Java implementation. However, when we attempt to interact with the WebElement using methods like click(), sendKeys(), getAttribute(), or getText(), the element suddenly disappears from the Document Object Model (DOM) or the page gets reloaded.
This discrepancy between the presence of the element when initially located and its disappearance when interacted within a fraction of a millisecond or microsecond results in a StaleElementReferenceException.
To handle this issue, several methods can be employed:
One approach is to wait for the page or grid to reload using Thread.sleep() before attempting to interact with the element using findElement followed by the desired action.
Another way to handle the issue is, if it occurs frequently and the time required for the reload is uncertain, a retry logic can be implemented using a try-catch block to handle the StaleElementReferenceException. In the catch block, you can retry finding the same element repeatedly with a maximum number of retries or a maximum timeout when encountering the StaleElementReferenceException.
Another option is to use WebDriverWait with ExpectedConditions. There is a specific ExpectedCondition called stalenessOf(), which allows you to wait for the staleness of an element to disappear before starting interaction with the WebElement.
These are different approaches available to handle the StaleElementReferenceException.
Q.19. Can you demonstrate how to construct an XPath to select an element based on its relationship with a sibling or ancestor element?
Explanation:
XPath locator is used when there is no stable attributes are found for an element in the DOM. XPath provides several axes that allow you to navigate through the hierarchy of elements in an HTML document. The following-sibling, preceding-sibling, and ancestor axes are particularly useful for selecting elements based on their relationship with sibling or ancestor elements.
XPath -Selection using Sibling Axes
Sibling Selection can be done in two ways:
- Using Elder reference to the target element
Syntax:
//tagName[@attribute=’attributeValue’]/following-sibling::tagName of targeted Element- Using Younger reference to the targeted element
Syntax:
//tagName[@attribute=’attributeValue’]/preceding-sibling::tagName of targeted ElementIf I have the following DOM structure,
<div>
    <span>Element 1</span>
    <span>Element 2</span>
    <span>Element 3</span>
</div>
To select the <span> element that follows the first <span> element, I will use the following XPath:
//span[text() = 'Element 1']/following-sibling::span[1]To select the element that precedes the third element, you will use the following XPath:
//span[text() = 'Element 3']/preceding-sibling::span[1]Selecting an ancestor element:
If I have the following HTML structure:
<div id="grandparent">
    <div id="parent">
        <div id="child">
            <span>Target Element</span>
        </div>
    </div>
</div>
To select the <div> element with an id of “grandparent” that is an ancestor of the <span> element, I can use the following XPath:
//span[text() = 'Target Element']/ancestor::div[@id = 'grandparent']Q.20. How would you set up a Selenium test to run in a headless mode for a specific browser version? Can you talk through the process and the considerations you would have?
Explanation:
“Headless mode” means that the browser will not be visible during execution; it will run in the background and won’t be visible to the user. However, Selenium’s getScreenShotAs() method can capture snapshots, and mouse and keyboard actions will be executed just like in a regular, visible browser.
Here’s how to implement headless mode using ChromeOptions: You should open the ChromeOptions class and call the addArguments() method, passing the argument "--headless" to run the browser in the background as expected. When running in headless mode, you may encounter occasional failures, particularly with click actions or mouse-related actions. Therefore, it’s advisable to implement a retry mechanisms in your code. In some cases, we have observed that headless mode can lead to failures, so it’s not recommended for extensive use unless you have a specific need for it.
Code Snippet:
ChromeOptions options = new ChromeOptions();
options.addArguments("--headless");
This code configures Chrome to run in headless mode, as described.